
Introduction
If you’re looking to streamline your Flutter app’s deployment to the AppStore and PlayStore, you’ve come to the right place. We’ll be using Fastlane and GitHub Actions to automate our workflow. By the end of this tutorial, you’ll have an automated pipeline that builds and deploys your Flutter app to your preferred app stores. In this guide we will skip all the setup and configuration of Fastlane and GitHub Actions, and focus on the Flutter and workflow-specific parts of the setup.
Repository: Flutter App CI/CD with Fastlane and GitHub Actions
Prerequisites
- A Flutter app
- Flavors and environment Variables set up in your Flutter app. You can follow the official Flutter guide to set this up.
- You should be able to build a release version for Android and iOS. You can follow the Android guide and iOS guide to set this up.
- A GitHub account with your app repo.
- Fastlane installed on your local machine. You can follow the official Fastlane installation guide.
- AppStore and PlayStore accounts ready for deployment with your app project setup.
- Follow the initial CD Flutter Guide to set up the Fastlane folders in your Flutter project.
When you have completed all the prerequisites, you should have the following project structure with Fastlane folders in both iOS and Android folders:
- android
  - fastlane
    - Appfile
    - Fastfile
- ios
  - fastlane
    - Appfile
    - Fastfile
Setting up the Fastfiles and environment
Now we will set up the Fastfiles for both iOS and Android. We will define lanes for deploying the app to the AppStore and PlayStore.
Android
-
Open
android/Gemfileand add the flutter version plugin we need to extract the version from the pubspec.yaml file:# ... source "https://rubygems.pkg.github.com/tianhaoz95" do gem "fastlane-plugin-flutter_version", "1.1.15" end -
Open
android/fastlane/Appfileand set the path to your service account JSON file and the package name of your app:You have created the service account JSON file in the CD Flutter Guide. Make sure to exclude the file from your git repository.json_key_file("path/to/your/service-account.json") package_name("com.example.yourapp") -
Open
android/fastlane/Fastfileand define thedeploylane (delete the existing content):More information about thedefault_platform(:android) platform :android do desc "Deploy a new version to Google Play" lane :deploy do version = flutter_version() upload_to_play_store( track: 'internal', # Can be 'internal', 'alpha', 'beta', 'production' skip_upload_metadata: true, # Skip uploading metadata skip_upload_images: true, # Skip uploading screenshots skip_upload_screenshots: true, # Skip uploading screenshots release_status: "completed", # Can be 'draft', 'completed', 'halted' aab: '../build/app/outputs/bundle/release/app-release.aab', # Path to your AAB file version_code: version["version_code"], # From pubspec.yaml version_name: version["version_name"] + version["version_code"], ) end endupload_to_play_storeaction can be found here. -
Run
bundle installin theandroiddirectory to install the required gems. -
Run
fastlane supply initto initialize the PlayStore metadata. This will allow you to update metadata like app description or screenshots without leaving your IDE. You can skip this step if you don’t want to upload any metadata. -
Build the app with
flutter build appbundle --releaseand make sure the AAB file is located in the path you defined in the Fastfile and to use the release signing keys. Follow the Android guide to set up release signing. -
Before deploying your first release, you need to have at least one release already uploaded and published manually.
-
Run
fastlane deployto start the lane and deploy your app to the PlayStore.
Depending on your setup, you might need to adjust the upload_to_play_store action to match your requirements.

iOS
-
Open
ios/Gemfileand add the Flutter version plugin again:# ... source "https://rubygems.pkg.github.com/tianhaoz95" do gem "fastlane-plugin-flutter_version", "1.1.15" end -
Open
ios/fastlane/Appfileand define the app identifier, the Apple ID of your Apple developer account, and the team ID:app_identifier("com.example.yourapp") apple_id("test@your.email.com") itc_team_id("123456") -
Open
ios/fastlane/Fastfileand define thedeploylane (delete the existing content):More information aboutplatform :ios do lane :deploy do pilot( skip_waiting_for_build_processing: true, # Skip waiting so we don't waste precious build time changelog: "This build was uploaded using fastlane", ipa: "../build/ios/ipa/flutter_github_actions.ipa" # Path to your IPA file ) end endpilotcan be found in the Fastlane documentation. Depending on your setup you might need to use actions likegymormatchto build the IPA file. -
Run
bundle installin theiosdirectory to install the required gems. -
Run
fastlane deliver initto initialize the AppStore metadata. This will allow you to update metadata such as app description or screenshots without leaving your IDE. You can skip this step if you don’t want to upload any metadata. -
Make sure you have already created an app in AppStore Connect.
-
Depending on the account you are using you might need to further authenticate with an app-specific password. Refer to the Fastlane documentation for more information.
-
Run
fastlane deployto start the lane and deploy your app to the AppStore.
Depending on your setup, you might need to customize the actions to suit your requirements. Also consider to use the actions.

Setting up GitHub Actions
Now that Fastlane is set up and you have successfully run the lanes manually on your local machine, we can automate the deployment process using GitHub Actions.
Now, let’s automate these processes with GitHub Actions:
-
In your GitHub repo, create a new directory
.github/workflows. -
Create a new file in this directory, e.g.
deploy.yml. -
We need to create some secrets. Go to your repository settings and add the following secrets:
STORE_PASSWORD: The password for your keystore file.KEY_JKS: The base64 encoded keystore file.SEC_JSON: The base64 encoded service account JSON file.FASTLANE_APPLE_APPLICATION_SPECIFIC_PASSWORD: The app-specific password for your Apple developer account.
To encode the files, you can use the following command:
Copy the output and add it as a secret.cat path/to/your/file | openssl base64 -
Add the following content to the
deploy.ymlfile:name: Build and Deploy on: workflow_dispatch: jobs: build_android: concurrency: group: ${{ github.workflow }}-${{ github.ref }}-android cancel-in-progress: true name: Build and Deploy Android runs-on: self-hosted steps: - uses: actions/checkout@v4 - uses: actions/setup-java@v3.3.0 with: distribution: "zulu" java-version: "17" - name: Create Key properties file run: | cat << EOF > "./android/key.properties" storePassword=${{ secrets.STORE_PASSWORD }} keyPassword=${{ secrets.STORE_PASSWORD }} keyAlias=upload storeFile=./key.jks EOF - name: Decode key file run: echo "${{ secrets.KEY_JKS }}" | openssl base64 -d -out ./android/app/key.jks - name: Decode sec json file run: echo "${{ secrets.SEC_JSON }}" | openssl base64 -d -out ./android/sec.json - uses: subosito/flutter-action@v2 - run: flutter packages pub get - run: flutter build appbundle --release - name: Fastlane Action uses: maierj/fastlane-action@v2.3.0 with: lane: deploy subdirectory: android build_ios: concurrency: group: ${{ github.workflow }}-${{ github.ref }}-ios cancel-in-progress: true name: Build and Deploy iOS runs-on: self-hosted env: FASTLANE_APPLE_APPLICATION_SPECIFIC_PASSWORD: ${{ secrets.FASTLANE_APPLE_APPLICATION_SPECIFIC_PASSWORD }} steps: - uses: actions/checkout@v4 - uses: subosito/flutter-action@v2 - run: flutter packages pub get - run: flutter build ipa --release - name: Deploy iOS Beta to TestFlight via Fastlane uses: maierj/fastlane-action@v2.3.0 with: lane: deploy subdirectory: iosLet me break down what this workflow does. There are two jobs,
build_androidandbuild_ios. Each job builds and deploys the app to the PlayStore and AppStore respectively. The jobs are manually triggered by theworkflow_dispatchevent. To build the Android app, we need to create thekey.propertiesfile and decode the keystore and service account JSON file. Then we build the app bundle and run the Fastlane action with thedeploylane. The iOS job is simpler, we just build the IPA file and run the Fastlane action with thedeploylane. -
Adjust the
flutter-versionas per your project’s requirements. -
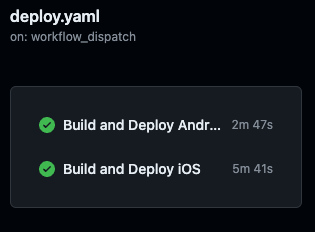
Trigger the workflow manually by going to the Actions tab in your GitHub repository and selecting the
Build and Deployworkflow. Click on theRun workflowbutton and select the branch you want to deploy. -
Sit back and watch the magic happen! ✨
Whenever you want to deploy a new version of your app, just edit the version in pubspec.yaml, push your changes to the main branch and trigger the workflow manually. The workflow automatically will build and deploy your app to the AppStore and PlayStore.
Build number
For some projects it makes sense to use the build number currently used on the respective platform. There are actions to retrieve the build number from the AppStore and PlayStore. You can use the app_store_build_number and google_play_track_version_codes actions to get the build number. You can then use this build number to set the version code in the Fastfile.
Conclusion
And that’s it! You’ve now set up a CI/CD pipeline for your Flutter app using Fastlane and GitHub Actions. This setup will automatically build and deploy your app to the AppStore and PlayStore. Time to sit back, relax, and let automation take care of the repetitive tasks.

We are still not done here. The next guide will cover how to automate the versioning, testing and of your app with Fastlane. Stay tuned! Happy coding! 🚀
Credits
Title image by Igor Dashko on iStock